While this method for growing carrot transplants could use some improvement, it works. The steps may seem long and involved, but after I organized the materials in boxes and buckets, reading about it probably takes longer.
Germinating carrot seeds
I germinate seeds in paper cups and then transfer sprouts to plastic or paper cells. This solves a problem with limited space on the heating pad, and I can use old seeds and transfer only the ones that sprout.
1. Cut a couple inched off the top of a paper coffee cup.
2. Add about 1 Tablespoon vermiculite, and then spray with water.
3. Scatter 60 carrot seeds on top, and press the seeds gently into the vermiculite. I use pelleted seeds, they're easier to count and distribute evenly.
4. Cover the cup with plastic wrap and hold in place with a rubber band. Place cup on a heating pad at 75 degrees Fahrenheit. I use thin sheets of insulation between the pad and the cups to regulate the temperature.
5. After about 6 days, the seedlings will be ready to transfer to paper pots.
Making long paper pots
This is a key part of the transplant process.Carrots have a long center tap root and they don't like to be transplanted. Using long paper pots that I can drop into holes in the garden works to solve the transplanting problems.
1. Find a cardboard tube or wooden stick about 1" in diameter. Some broom handles are about the right size.
2. Cut newspaper sheets 4" wide x 8" long. This length wraps around the cardboard tube slightly more than twice.
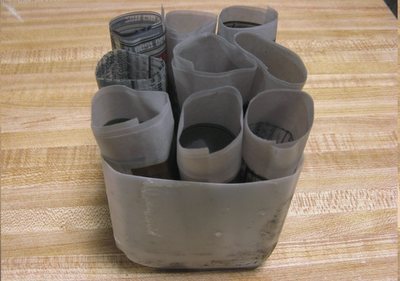
3. Cut 4 inches off the bottom of four 2 quart plastic milk bottles. The four plastic containers will hold 36 paper pots, 9 pots in each container.
4. Roll paper around 1" tube, and then roll paper in water. The water "sticks" the paper together.
5. Place paper tubs into a plastic container.
Transferring seedlings to paper pots
The part of the seedlings that will eventually be the carrots tend to grow out of the mix. You will need a 1" space at the top of pots to cover this part of the transplant as it grows.
1. Add moist growing mix up to 1" from the top of pots.
2. Loosen the vermiculite around the seedling roots.
3. Using a coffee stirrer, dig a hole about 3".
4. Gently pull a sprout from the germination cup. Again using the coffee stirrer, guide the carrot roots into the pot. Pull mix around seedling.
5. Pour about 2 Tablespoon of water down the side of each container.
6. Place under growing lights.
Growing carrot transplants
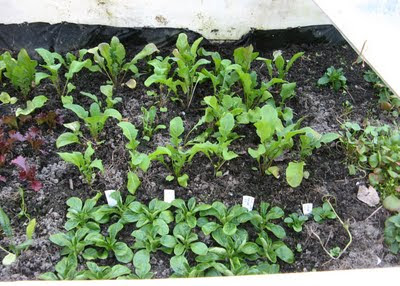
Carrot transplants are easy to grow under the shop lights I setup in my basement.
1. Each day, add water/fertilizer to container. Top of mix should always be moist. Carrots don't like dry soil.
2. As transplant grows, add growing mix to cover the roots up to the leaves. Adjust height of lights.
3. After 7 weeks, the carrots are ready to transplant into a garden bed.
Planting carrot transplants in garden
1. Prepare garden bed. For each 12 ft2 section, aerate with garden fork, add organic fertilizer (2/3 cup blood meal, 1/2 cup bone meal or 2/3 cup phosphate rock, 2 cups wood ash.) or inorganic fertilizer (2/3 cup 10-10-10, 1 cup dolomitic lime). Rake soil even.
2. Mark and dig holes. Within a 1 foot square, mark 12 holes.
3. Drop one transplant in each hole, pull soil around the plants. Do not cover the leaves.
4. Mulch with grass. This keeps the plants from drying out and helps to support the leaves from drooping.
5. Add wire support. Wind, rain, and pets like to knock over the plants. So, I place a wire support made from an old fence over the plants.
Growing carrot plants
1. When top 1/2 inch of soil is dry, add water. About 1/2 cup per plant.
2. Remove weeds or mulch with grass clippings.
3. Fertilize.
Harvesting carrot roots
1. After 12 weeks, scratch the soil away from the top of a few carrots. If the top diameter is greater than one inch, the carrots are ready to harvest.
2. Loosen soil with a hand fork, gently pull roots out.
3. Knock off the dirt.


